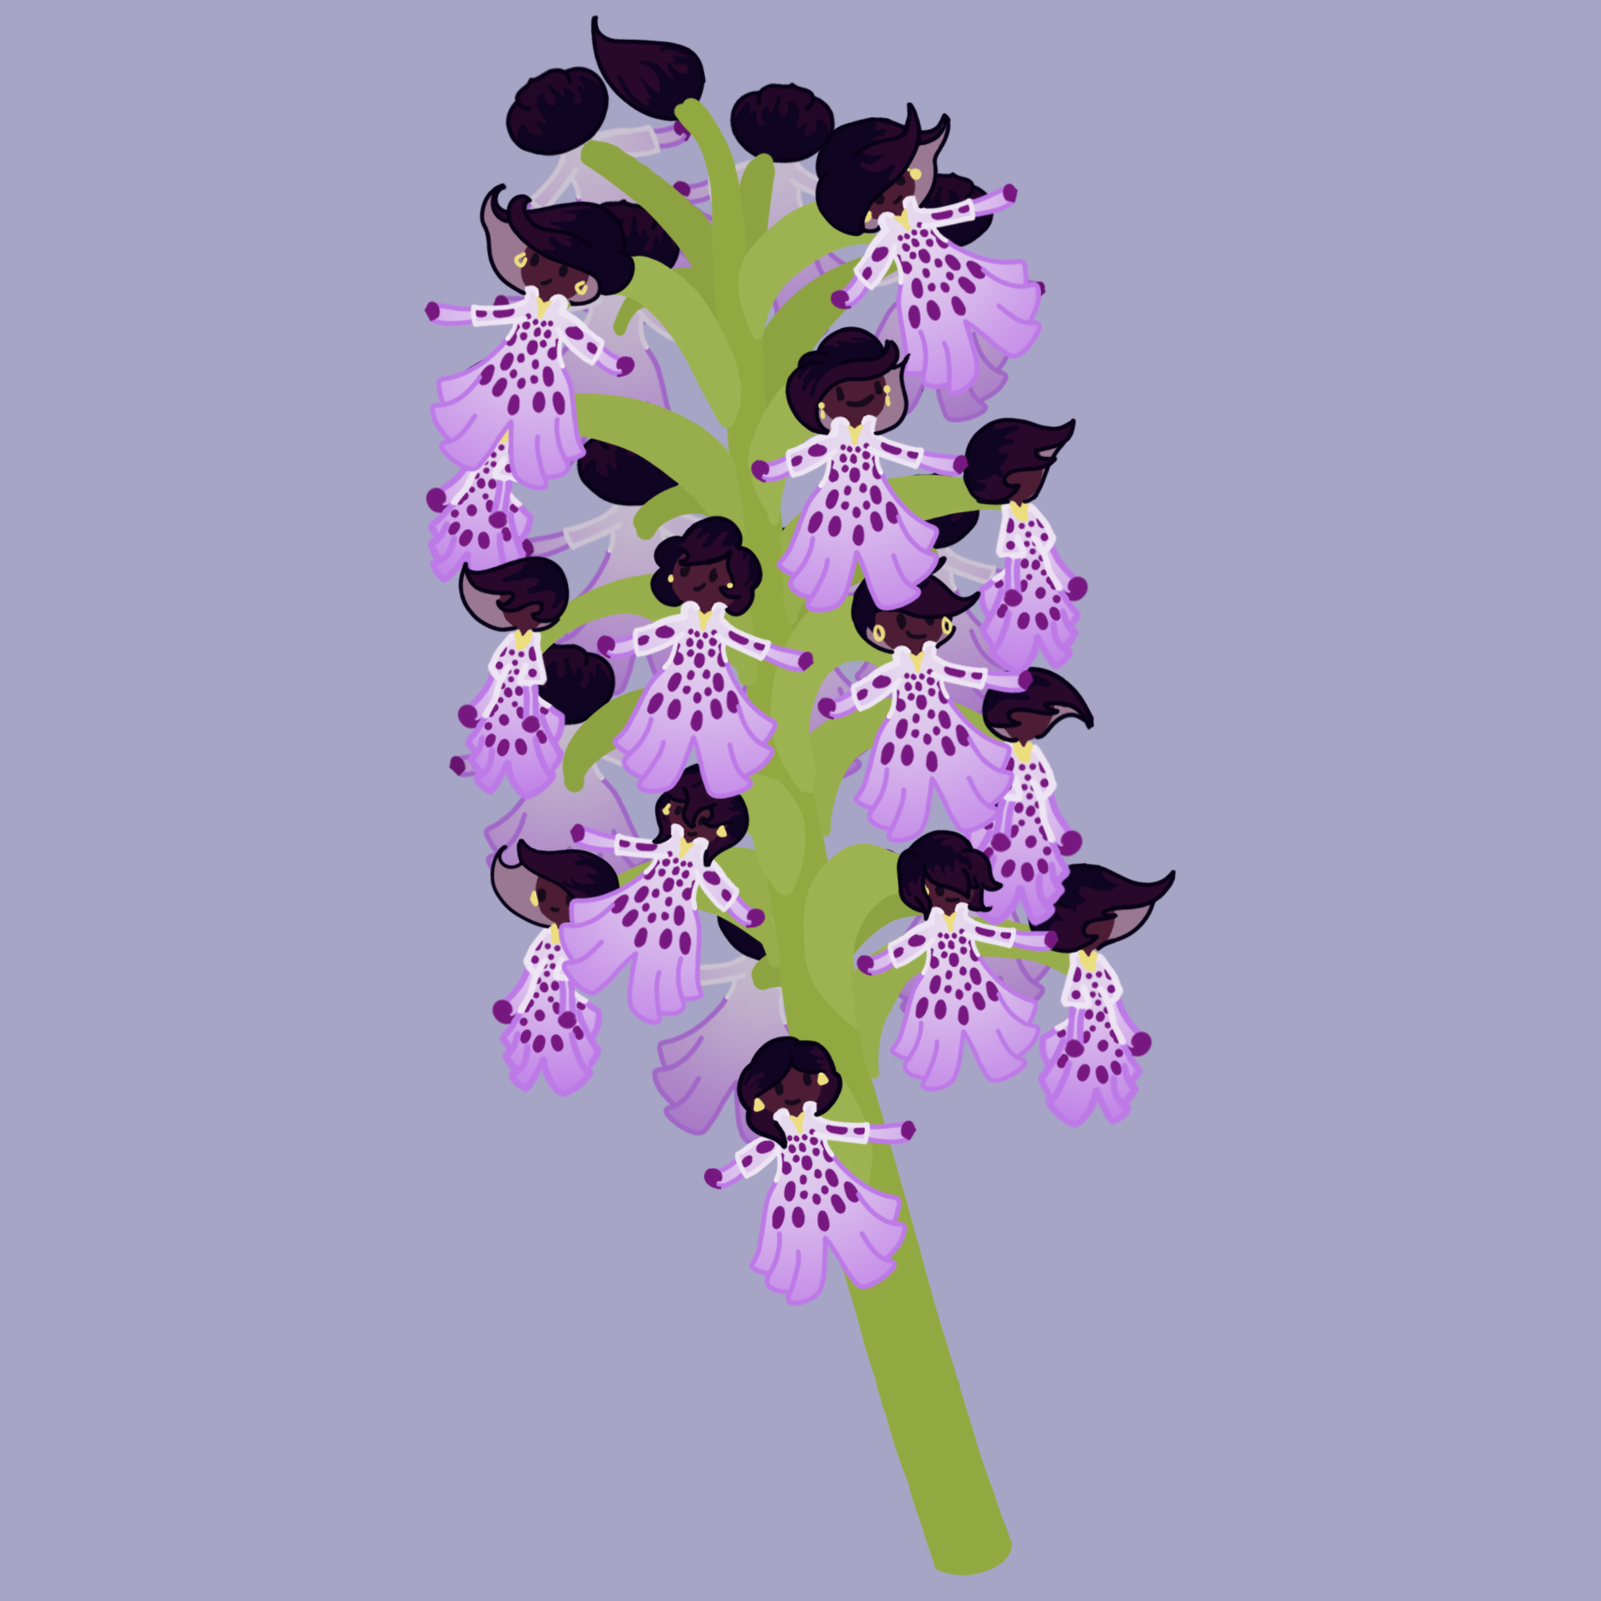
For the second flower, I chose to do a Lady Orchid, as they were another flower that was known to be critically endangered within the UK. The reason behind the name of the lady orchid is due to the appearance of the bloom looking like a person. In the column of the flower, the stamen make a face, and the lip of the orchid resembles a dress, of sorts. These attributes made it so that I wanted to make a plant with a flowers that looked like a lot of little ladies on it.
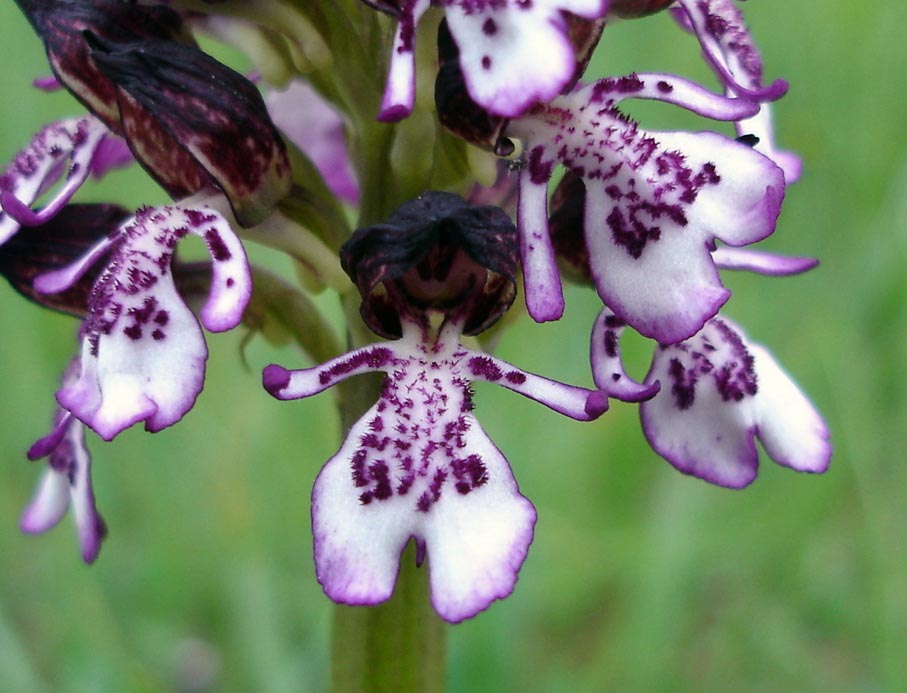
Photo from Wikimedia Commons under Creative Commons
I started this design trying to figure out what features in the flower could I then transfer to look like the features of a lady, as was the name sake of the plant. Though in the original flower, it is perhaps meant to be read that the split in the lip of the orchid is meant to simulate legs, I decided to accentuate the feminine nature of the plant by making this into a dress, however keeping true to the design by keeping the split in the middle, as seen in some of the orchids there is a ruffled depth to the lip, so I made the dress ruffled slightly to help with creating depth on my own flower. I then gradiented the dress from an off-white to a lavender colour to simulate how the lip of the orchid turns purple toward the tips. I do think my design does show a little too much lavender for a orchid that is, for the most part, white as a base. I did consider this to be an issue in my design, but after a while of trying different balances in the gradient, I found this to be the best version as it helped bring a little more interest into the design.
The areas on the original flower that were seen to be arms were very obvious, however in making my own design I tried to simulate there being sleeves to the dress. In looking at the original flower, I found there was a section to the 'arms' where the bristled bits stopped and the edges got darker, so I chose this to be where the sleeves would end on the flower, and make the curled darker ends of the plant similar to hands.
I also noted, that within the flower, there was a lot of bristles on it. I struggled slightly trying to figure how this texture would fit on a crinoline ball gown. I tried putting them onto the dress as a symmetrical pattern, as if to simulate large gems of sorts, though in the end I think they just work as a nice pattern of dots, and it's also clear how this illustration links to the orchid.
In looking at how the lip of the orchid attached to the column, I decided to give the dress of my flower a tall neckline leading into the column being the head of the lady.
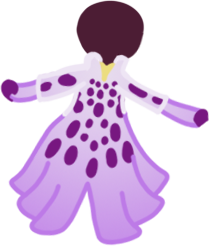
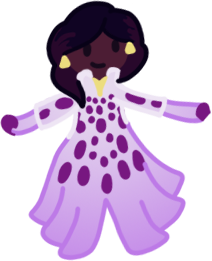
Using all these features, I formulated the base for all of the orchids that would be growing on this plant, as I decided that, for the whole plant, I would want each individual orchid bloom to look distinct from one another, as if the flower would be alive with chatting ladies. This would also mean that I had a basic enough base that I could mirror it, scale it, and rotate it to form the base of the other flowers and they would look different enough from one another without me putting in too much work.
In making my first individual lady, I knew that this would act as an a base that I would take inspiration from for making all the others, and with no other illustration to look at currently, I had to go back to figuring out how to inspire this design from the original plant.
Within the column of the original flower, it's clear that the anthers of flower resemble a face, however this face isn't exactly the most comforting face, so I decided that in my new illustration I would make the face look a lot friendlier for our cute game. I made it just as simplistic as the actual flower, with the two long eyes and a smiling mouth, but try to make the elements a little softer and more personified.
When looking at the sepal of the orchid, I realised I had two options with what to go with; the first was to make it very accurate to the original flower, and make an easy looking bonnet, which would match the dress (though not in a ball-style). The other option I had was to make the sepals into a hair for the lady, which would mean it was slightly more stylised, however would give a friendlier appearance to the flower. This would also allow for more variation between each flower, which would give the plant a unique appearance, which was the style I was going for.
The style I decided to go with for the sepal-hair was going to try to keep it short, so that it would stay true to the sepal only surrounding the column, however, I did want these to look like actual hairstyles that women would have. In the end, my first design did end up having the longest hair of all of them. The other decision I made when styling the hair was from an observation I had made when looking at the sepals. In the actual flower, the sepals are light toward the bottom, and darker at the top. In my own design, I used two different tones to simulate that the ladies had darker hair roots than the tips.
The third observation I made when looking toward the column of the flower was that there were lighter bits both within the inside of the sepal, and at where the neck of the lady would sit. Though looking at it now, I realise these areas are probably where the petal is both palest and thinnest, and this colour is probably the sun coming through, upon my first few viewings I had considered these to be key areas within the flower, so I also factored them into my design. I decided that the two within the sepal would look quite nice as earrings as they sat in a similar place, and that these could change shape to add more variation to the different women. I also then saw the one that sat on the neck to be a different piece of jewellery, possibly a necklace or a large gem on a choker, or it sat on the neckline of the dress, either way, I added this to the base of my design as I didn't think this allowed for much variation between the different blooms of the orchid.
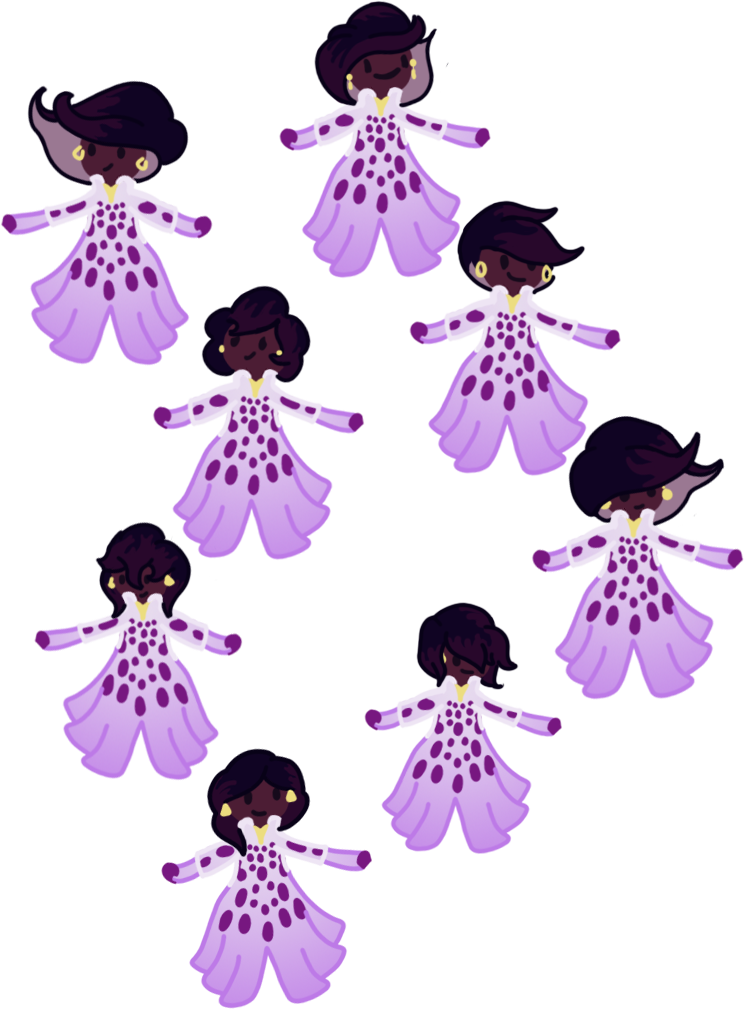
I then made seven more orchids using the base I had made previously, but changing the hair, face, and earrings to give each individual lady their own personification. I also tried to make a variation so that there would be specific ones for the left as opposed the the right sides. As seen in the image, the ones further to the edge have more hair because the orchid was at more of an angle so that the hair cupped a bit more, and those toward the bottom have longer fringes as, at the angle of the image, these would be seen as longer.
After making these designs, I realised that I'd have to make more flowers to fill up the rest of the plant, however these would have to be at different angles, and I wouldn't be able to use my original base, and I'd have to make a new base. I considered whether I'd make eight different angles, each with a 45 degree difference, however this seemed excessive, instead, I decided to only make four different angles: front, left, right, and back. Although, this would only need three different bases as the right and left ones could just be mirror of each other.
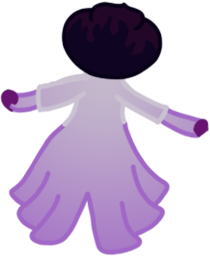
To make the side, I made a base like I had similar to how I did for the flower from the front angle, but instead I tried to give it the implication of a 45 degree angle from the originally. When I had decided on the angles, I thought this would be at a 90 degree angle, however when I was illustrating this, I decided that the 45 degrees would make this more interesting, and I would be able to have both more depth and diversity. Instead, when making the base, I decided that I would only change the hair of the lady, though, in the end, one of my designs did end up having a little more detail on the face as the head was a little more angled. As shown in one of the varied ladies, I tried to go for a similar style to the hair as the flower blooms that were to the side, in having fairly wide hair, however I decided not to put in as much detail as these side designs were not the focal point of the plant.
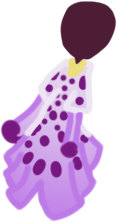

For the design of the back facing bloom, I chose to just take the original design for the base facing the front and take the detail out of it that would imply it was front-facing, as well as making face be covered with the sepals, as it would look from the back. I decided to take this shortcut as, for one, the Lady Orchid was taking a long time as it was for me design, at this time in the process I'd already put a week of my time into making it. Another reason for this was due to the fact since these would be at the back, they would be mostly covered. This was also the reason I decided to choose a standard design for the hair, as I could spend a lot of time detailing one of them, and it would be covered. I then decided to darken the design slightly and lower the contrast, so that it would allow the orchid blooms at the front to stand out a lot more, as they had the most detail and character, and were the focal point of the illustration.
Looking at the whole plant, I was able to see the vague way that the plant was structured, and was then able to assemble all the assets I had created in relation to the plant itself.
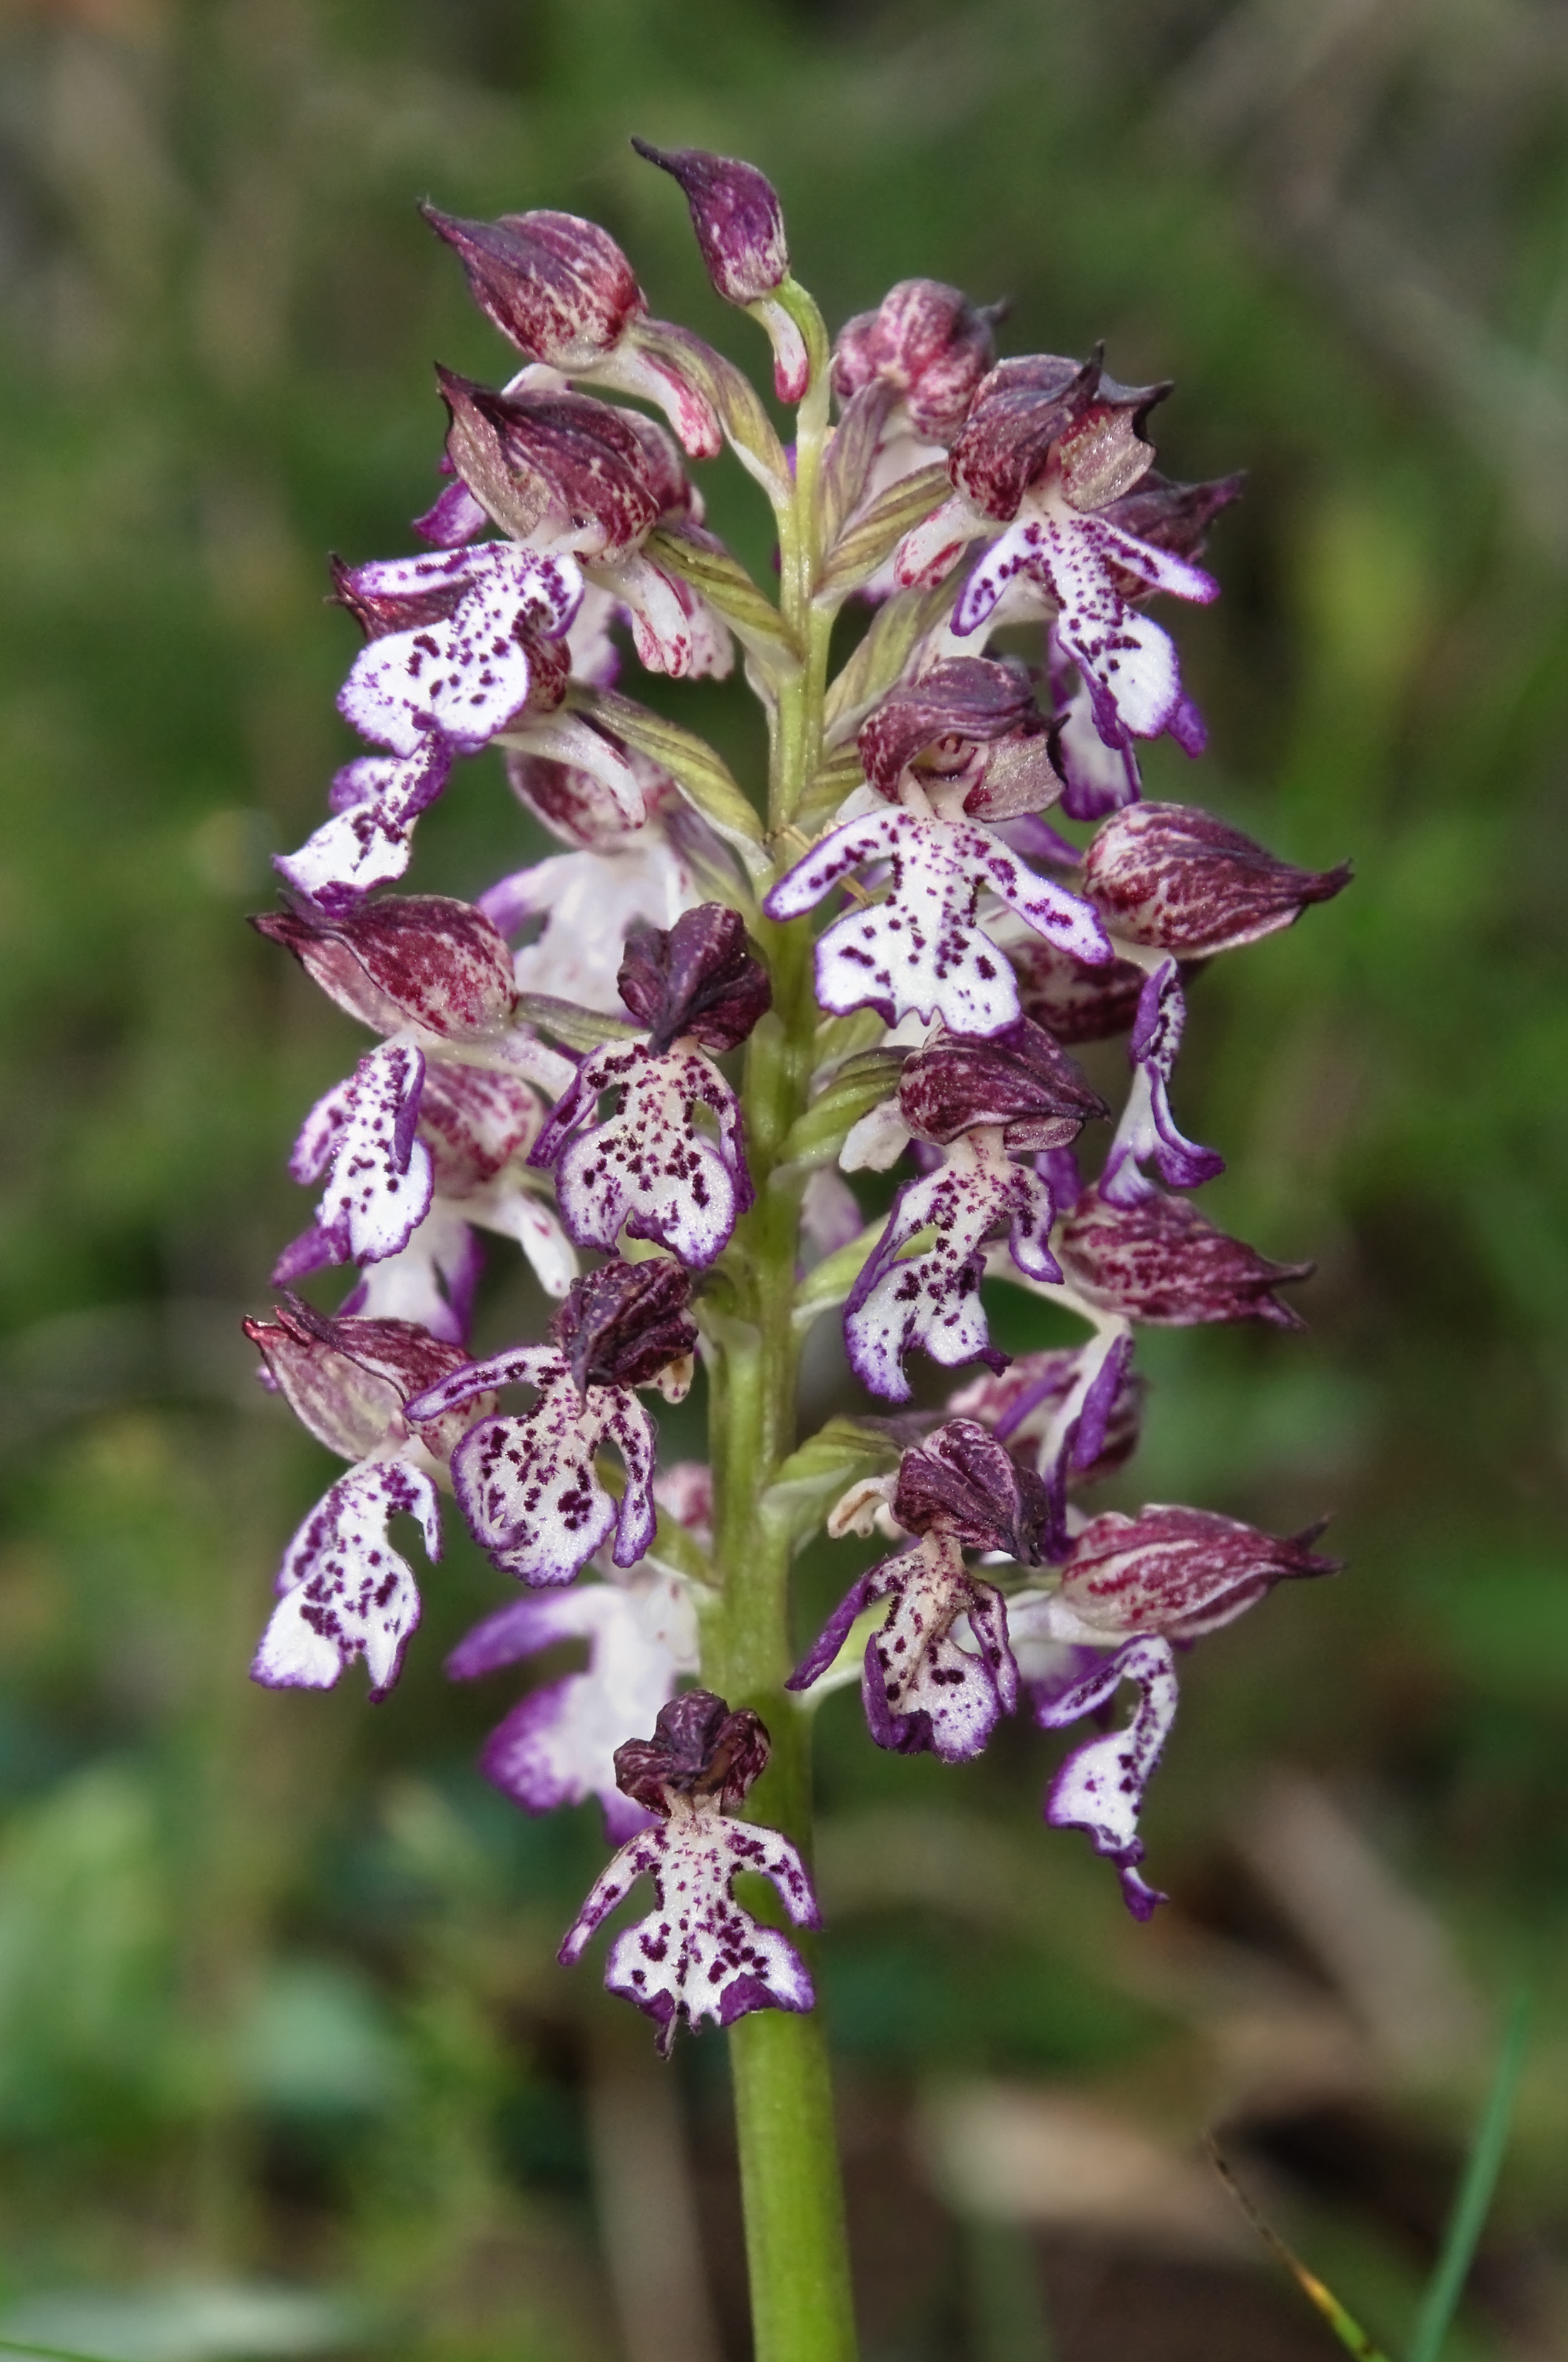
Photo from Wikimedia Commons under Creative Commons
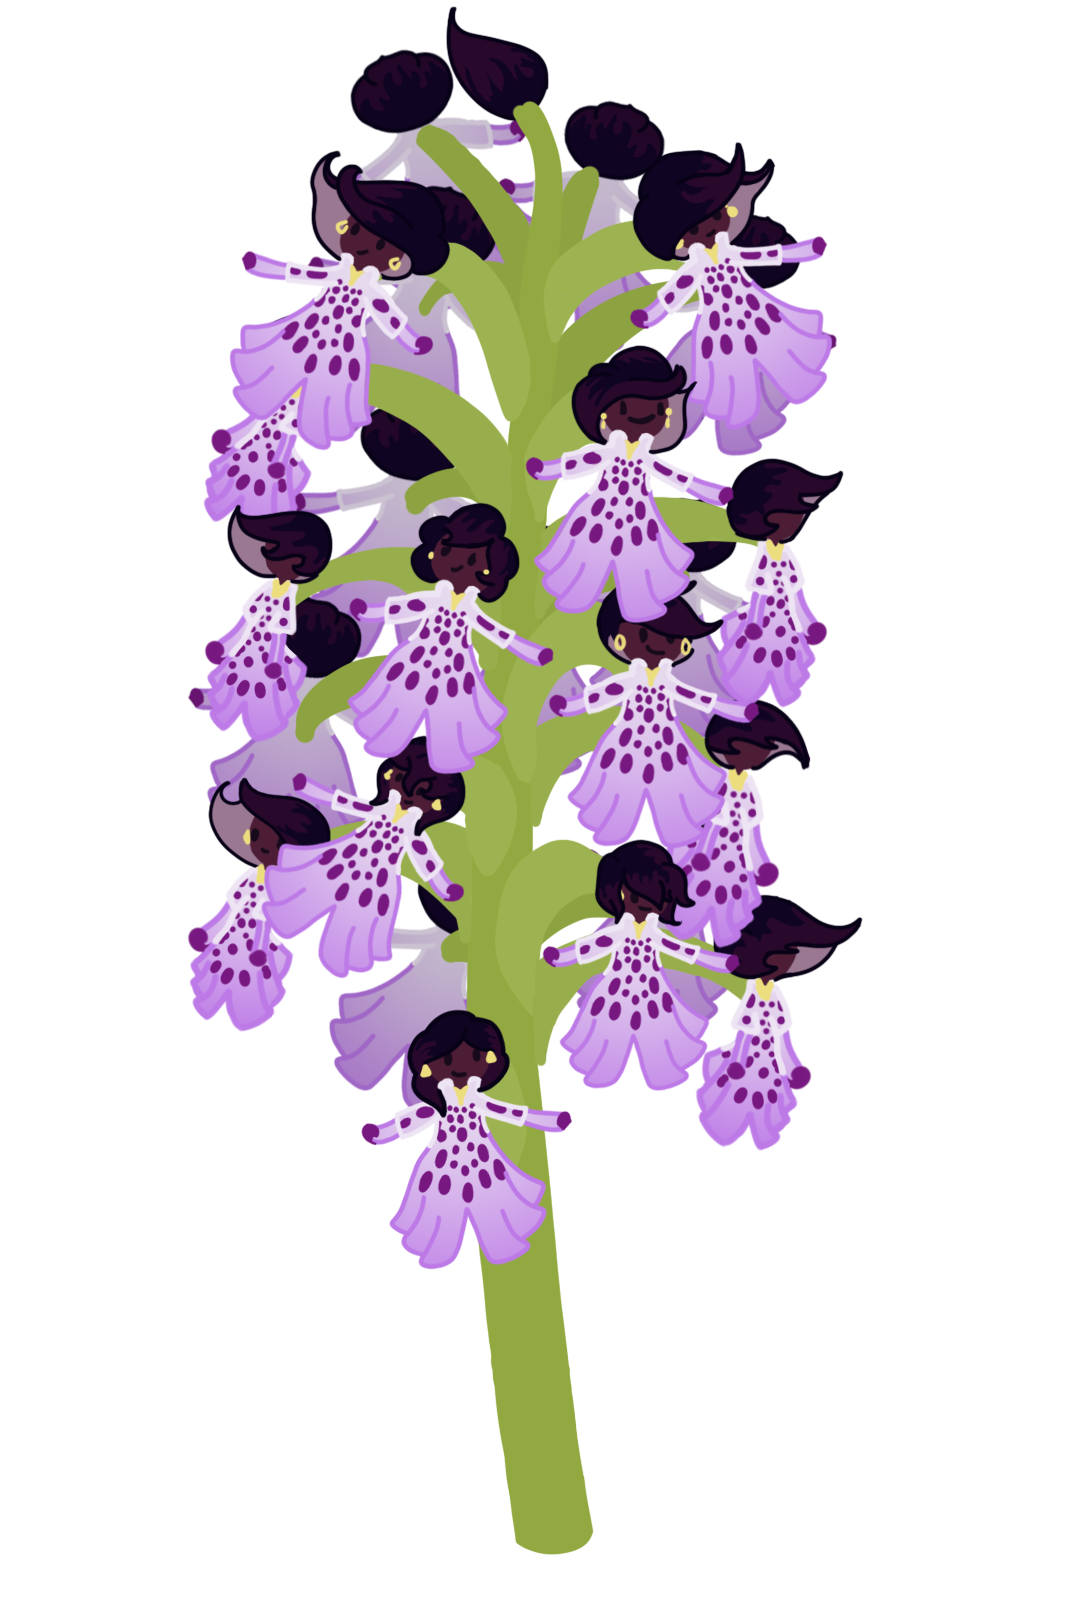
I then formatted all the elements I had illustrated, and added a stem to connect them all, using lighter and darker shades of a green to differentiate between the front and back of the flower. I also added a bud that was about to bloom at the top, as a lot of the flowers I looked at had a similar bud.
Overall, I think the design looks really good, I like how the design comes alive, not only with with different elements all forming one flower, but also with each flower bloom being different and they all look like they're interacting as if they all have a different personality.